READ UPDATE 3 BELOW, you need a stronger pulley than the Harken 306.
The cunningham (some call it downhaul) exit box from the mast is a cheap (read “Update 2” below) pulley with a workload in the range 150-200 Kg. That might be fine enough with soft / elastic sails, but with my Landenberger membrane sail 2015, I do pull the cunningham a lot. And when I mean a lot, it’s heavy stuff. To get the last centimeter down, I roll the sheet around my hand (glove-protected) and pull by extending my legs while hanging on the trapeze. So that’s probably at least 50 Kg multiplied by the 6:1 system into the mast, that’s in the range of 300 Kg. Note that with the next 2:1 system formed by the pulley hooked to the sail, I do apply ~ 600 Kg to my sail. I have heard that other sails are more elastic, it’s just mine that is hard and need a strict treatment.
I saw the Caviezel brothers used a stronger pulley and they told me how it works better. So this is the description how I replaced mine, step by step. You can do this as well provided you have the proper tools, but please be extra careful with your mast. The hammer is definitely a no-go with your precious piece of carbon. And take a few pics before disassembling your gear, if it is the first time you do that. The re-assembly will be easier.
I used these two models, they fitted my Fiberfoam mast well:
- Harken 306 wire-block. Workload 680 Kg. In Switzerland, Duvoisin Nautique has them in stock. Do not ask me where to find them in other countries.
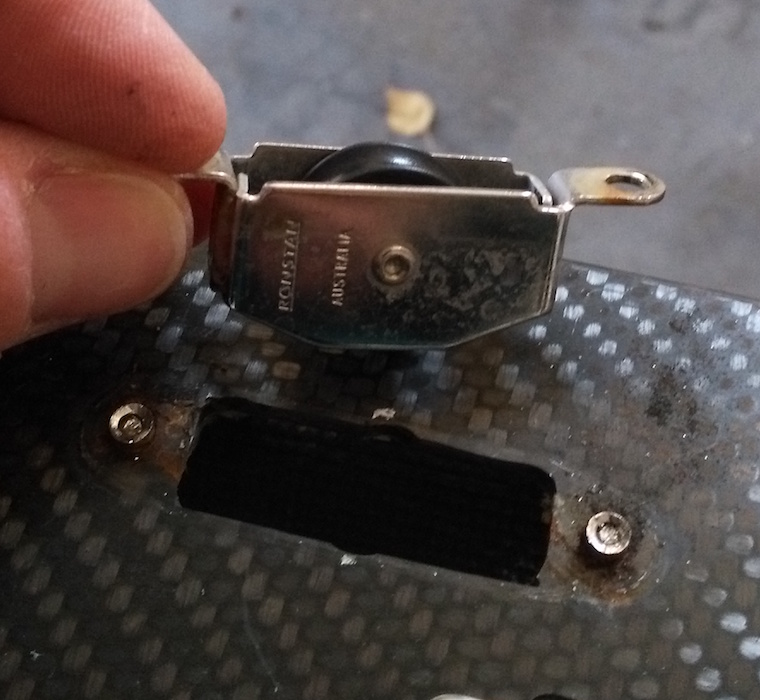
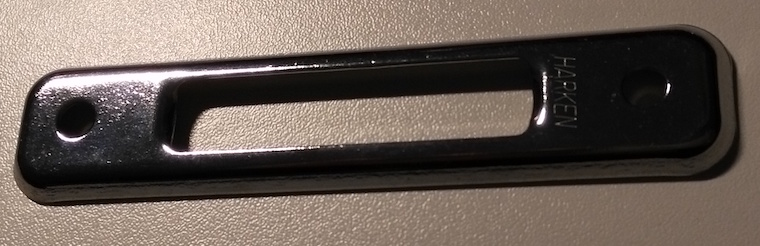
- Ronstan RF20151A for the turning block just above the new 306 you will put in place.
Start by releasing your diamond cabling. That’s the first step to remove the base plate of the mast.
Continue by removing the base plate. On mine, I had to remove the two 6mm screws on each side and then the two 4mm screws holding the small exit pulleys to the base plate (not shown below).
The mast base is now ready to work on it.
I needed to remove the two pulleys. The base one I wanted to replace, and the above one because it is in the way of the new larger pulley I will use as a replacement.
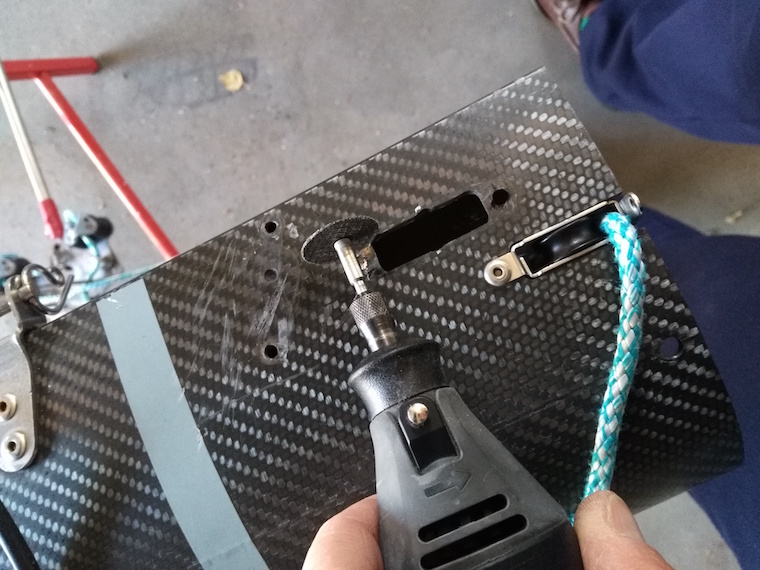
Removing these pulleys means removing the rivets. Usually, it is easy by only piercing through them, but I think these ones were re-inforced and epoxy-glued, so their removal was a bit harder than usual. Once again, resist the tentation to use a hammer. I used a Dremel and my Bosch drill. Use a very slow rotation and ask a friend to cool the place with water during the drilling.
In the process, I destroyed the small Ronstan turning block and had to buy a new one to replace it. Maybe you can re-use yours if you are more careful than me.
That’s how it looks after the drilling and before removing the original pulley.
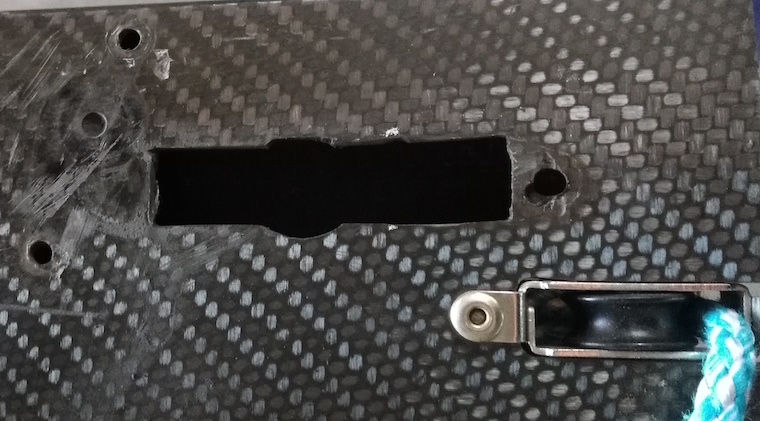
This part is done. Repeat with the other pulley if you have one (not all masts have the guiding one). This is when you need to be patient to remove the remains of the rivets. Forget that hammer and be gentle !
A clean base to restart. This is how it should look if you work like a beginner. By being a little bit more careful than me, the surface of your mast should stay pristine. Maybe protecting the mast with some tape before working on it might be an idea. Too late for mine.
You might notice the top-rivet still in place. No worries, the Dremel will cut the carbon around it.
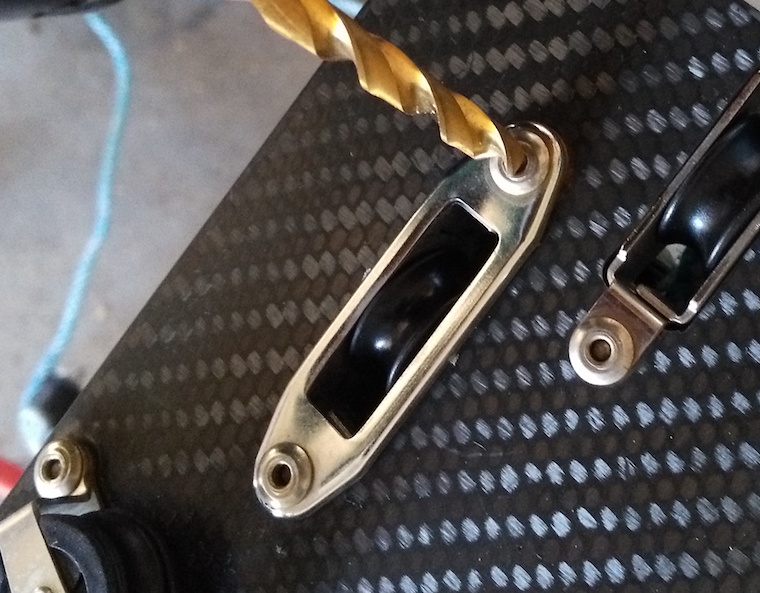
Mark your mast with the template for the Harken 306.
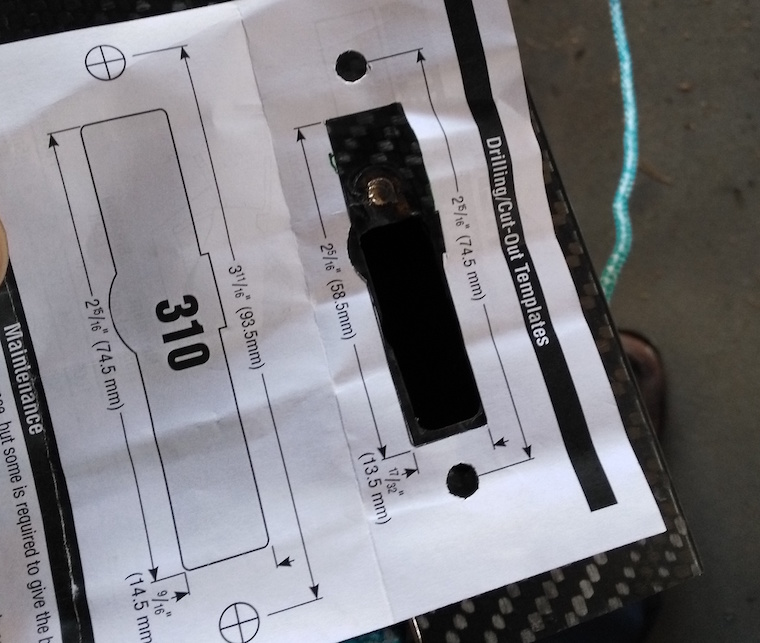
Cut through your mast by enlarging the existing hole towards the top of the mast. We will re-use the lower hole.
Larger hole ready. No, it doesn’t really look that nice and I’m sure you will do better.
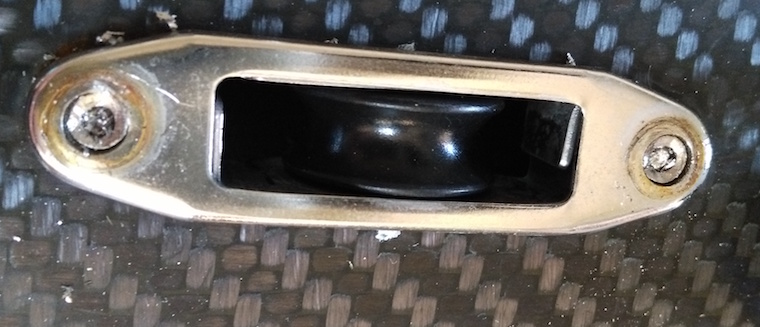
New pulley in place. Drill 5mm holes through the mast using the pulley holes as guides.
A M5 screw toward the bottom of the mast, a rivet toward the top. I wanted two screws, but I couldn’t reach the top nut from inside the mast. Use stainless steel rivets, not aluminium. The aluminium ones produce an electrolysis effect when coupled with carbon and weaken your mast around the hole.
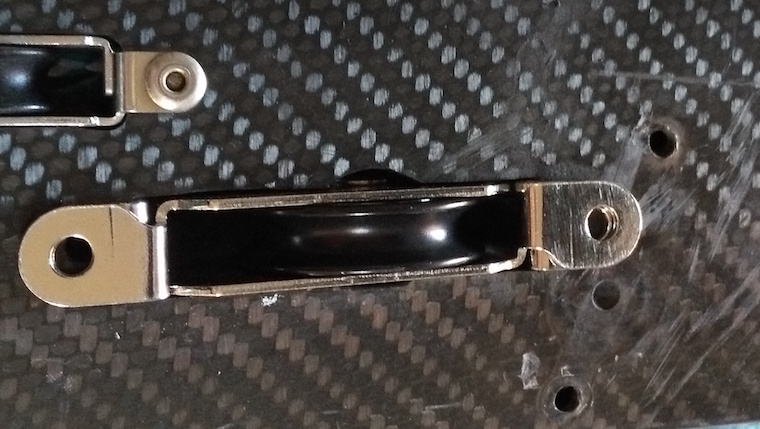
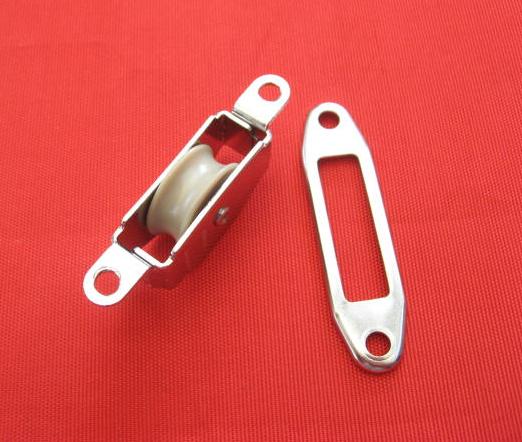
Old and new pulleys side by side.

I didn’t use the shiny top-plate. Heavy and no need for it.
I’m missing the small turning block, I will get it on Monday and update this page when its installation is done.
While you do have your mast disassembled, take the opportunity to inspect and/or replace the internal cunningham lines.
Update 1 (3.11.2016) : I sailed Marseille La Pelle with this new setup and the downhaul is noticeably easier to pull, at least my hands hurt a bit less after 3 days sailing.
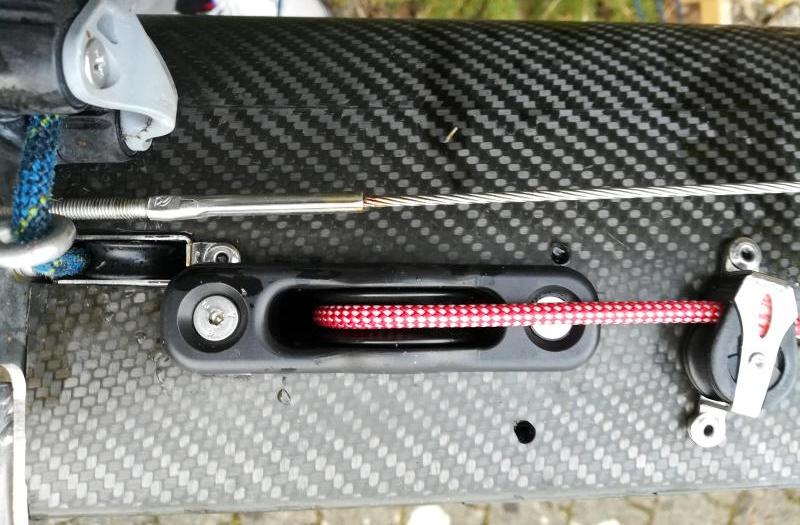
Update 2 (16.3.2017) : Scott wrote me explaining why he originally used the “cheap” model. There were simply no stronger one on the market. I have probably been a bit harsh with my qualification of “cheap”. The good news is, there is something better from Ronstan, in the same size, so retrofitting will be easier. Besides, masts come with the stronger model since June 2016.
Picture from Scott: the new model with a stronger sheave. Available on the Fiberfoam shop (H.D.Exit Pulley - Cunningham).
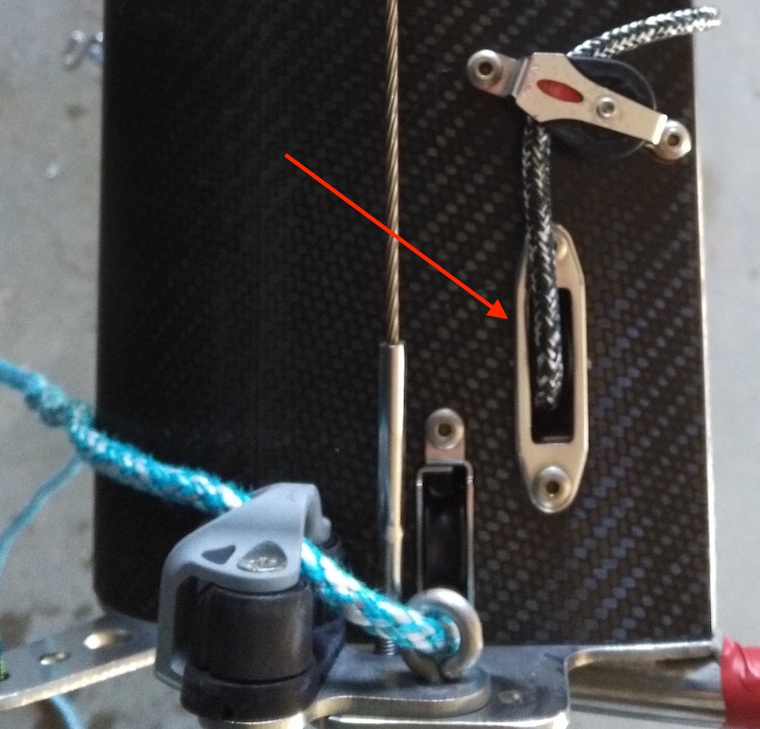
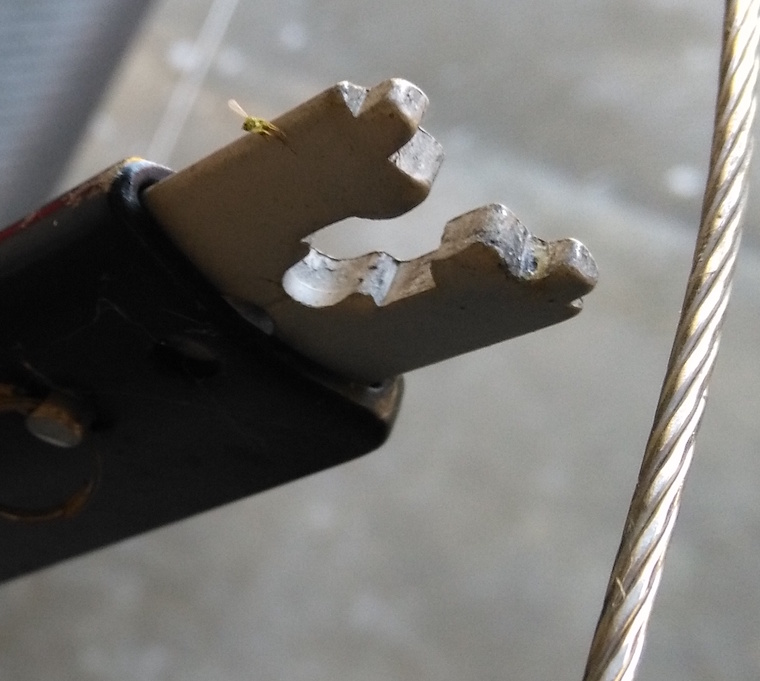
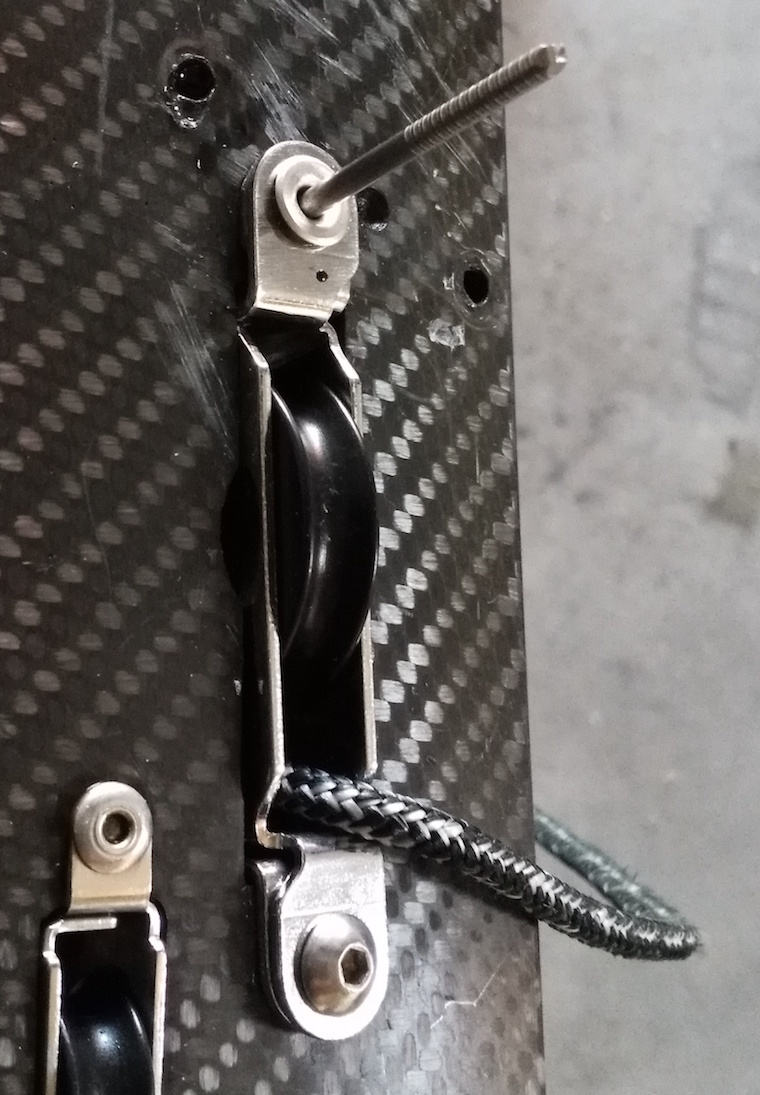
Update 3 (21.3.2020) : I kept breaking the Harken 306, twice in a row. Despite the 5 years warranty, Harken would not replace the broken pulleys - without giving any reason. They recomended to use a stronger model, the “40 mm Protexit™ Exit Block”, part No. 1202. It has the same hole-spacing, but the case is wider, 18mm. So I had to enlarge my hole, and use countersunk screws. Note the HK1202 is quite expensive, around 100€.
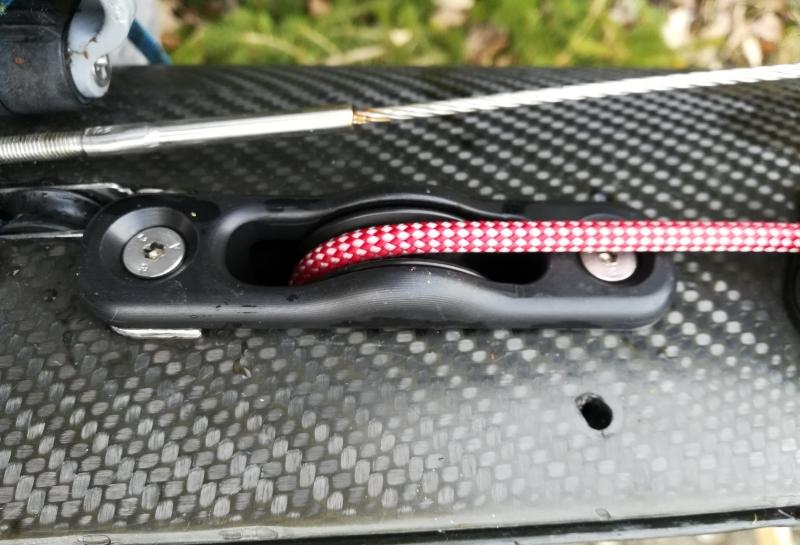
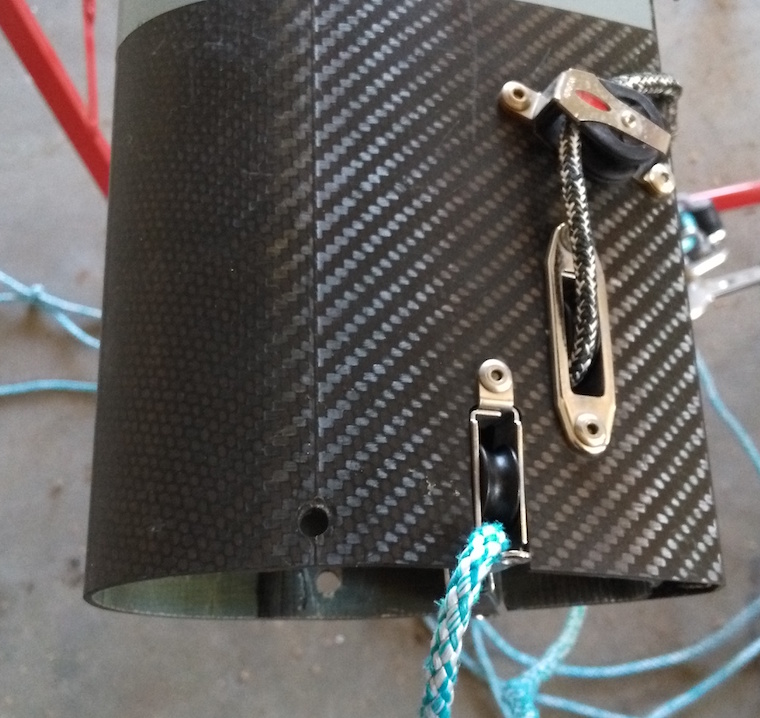
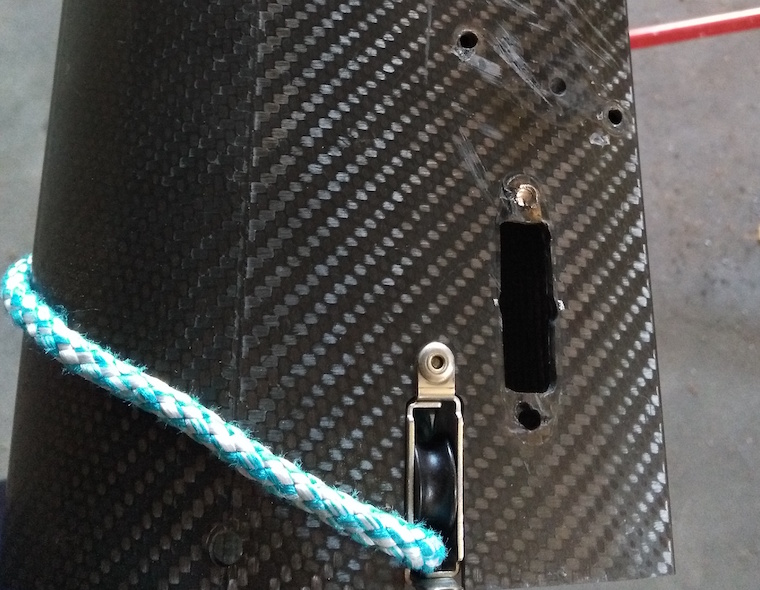
Note how the back of the plate covers the other pulley so I had to lift it with a 2mm piece of inox steel, the added benefit being the rope doesn’t rip on the front of the plate under load.
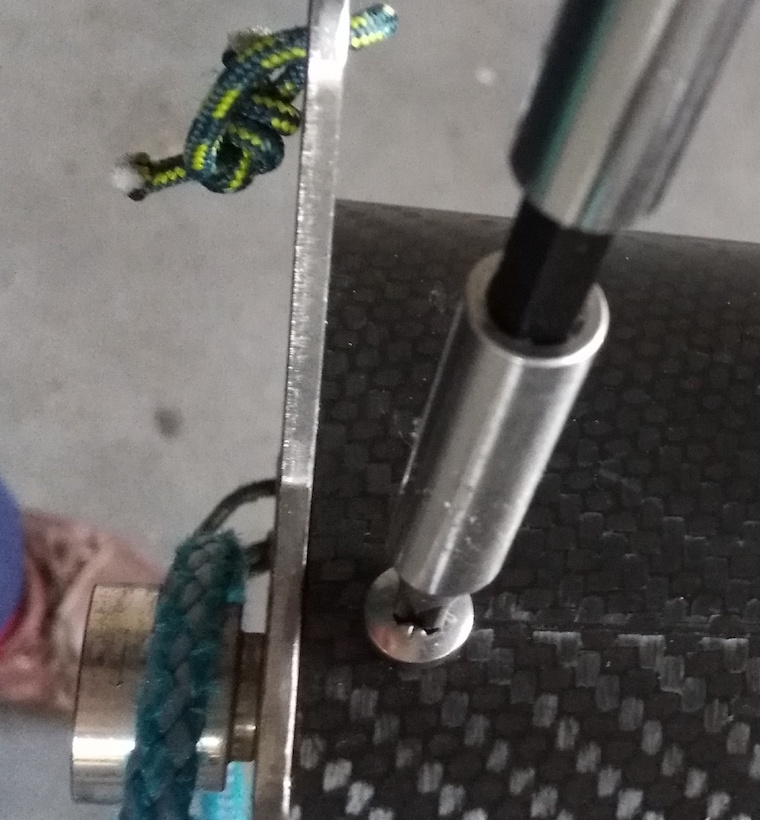
Additionaly, I used screws, washers and nuts on both sides instead of rivets. Much simpler to remove and re-use than rivets. To tighten the top one, attach a star wrench to a sail batten, about 30° angle, facing backwards. Stick rubber band from under it, put the nut inside the star wrench, add a washer on top and carefuly move it inside, until you see it through the hole. Then go in with the nut and tighten it from outside. Seem complex but is simple in reality. Next time I do this I’ll make a pic.